Make your first set
A set is a group of matching gear — a helmet, chestplate, leggings and boots that look like they belong together. A set can hold as many pieces as you like.
1. Click New Set

- Import .nxe — loads a set someone sent you. Not this time.
- New Set — this one.
2. Fill in two boxes
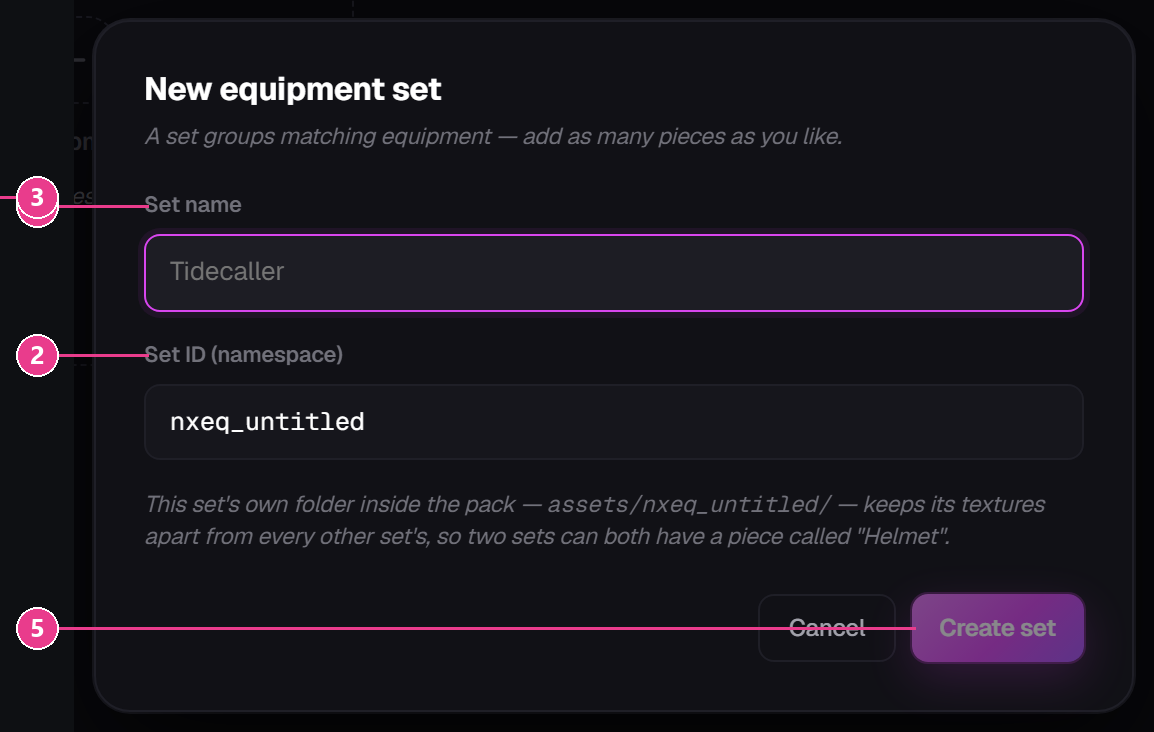
- Set name — whatever you want to call it. Tidecaller, Forest Warden, Dragon Plate. This is just for you.
- Set ID (namespace) — fills in on its own from the name. Leave it alone unless you have a reason. It keeps this set's files apart from every other set's.
- The helper text explaining what the namespace does.
- Cancel — back out.
- Create set — greyed out until you type a name.
Pick the name you want now. You can edit the set's other details later, but the set name itself is fixed once you create it.
Your set now appears as a card on the sets screen:
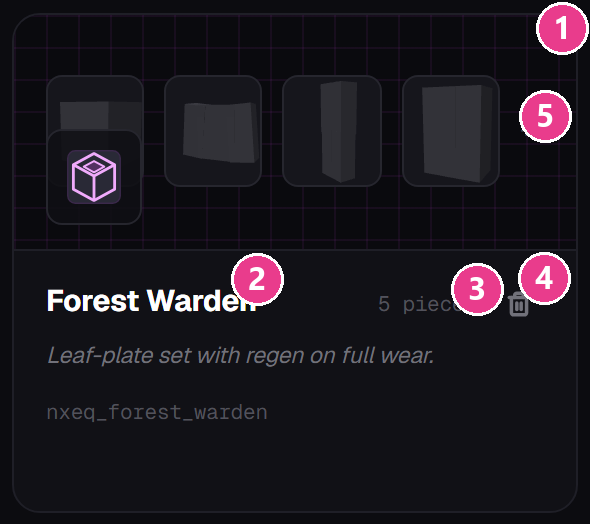
- Live previews of the pieces inside, spinning slowly.
- Set name.
- How many pieces it holds.
- Delete set — the trash icon. This one does ask before deleting.
- Namespace — the folder name you chose.
3. You're on the set's own screen

- Namespace — the set's folder name. Read-only.
- Pieces — how many pieces it has.
- Edit details — author, version, website, description, and the logo used as the set's icon in the in-game menu.
- Delete Set — removes the whole set. It asks first.
4. Add a piece
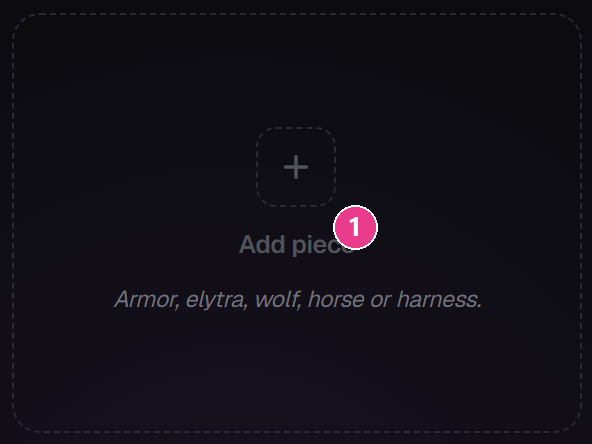
- Add piece — the dashed tile at the end of the piece list.
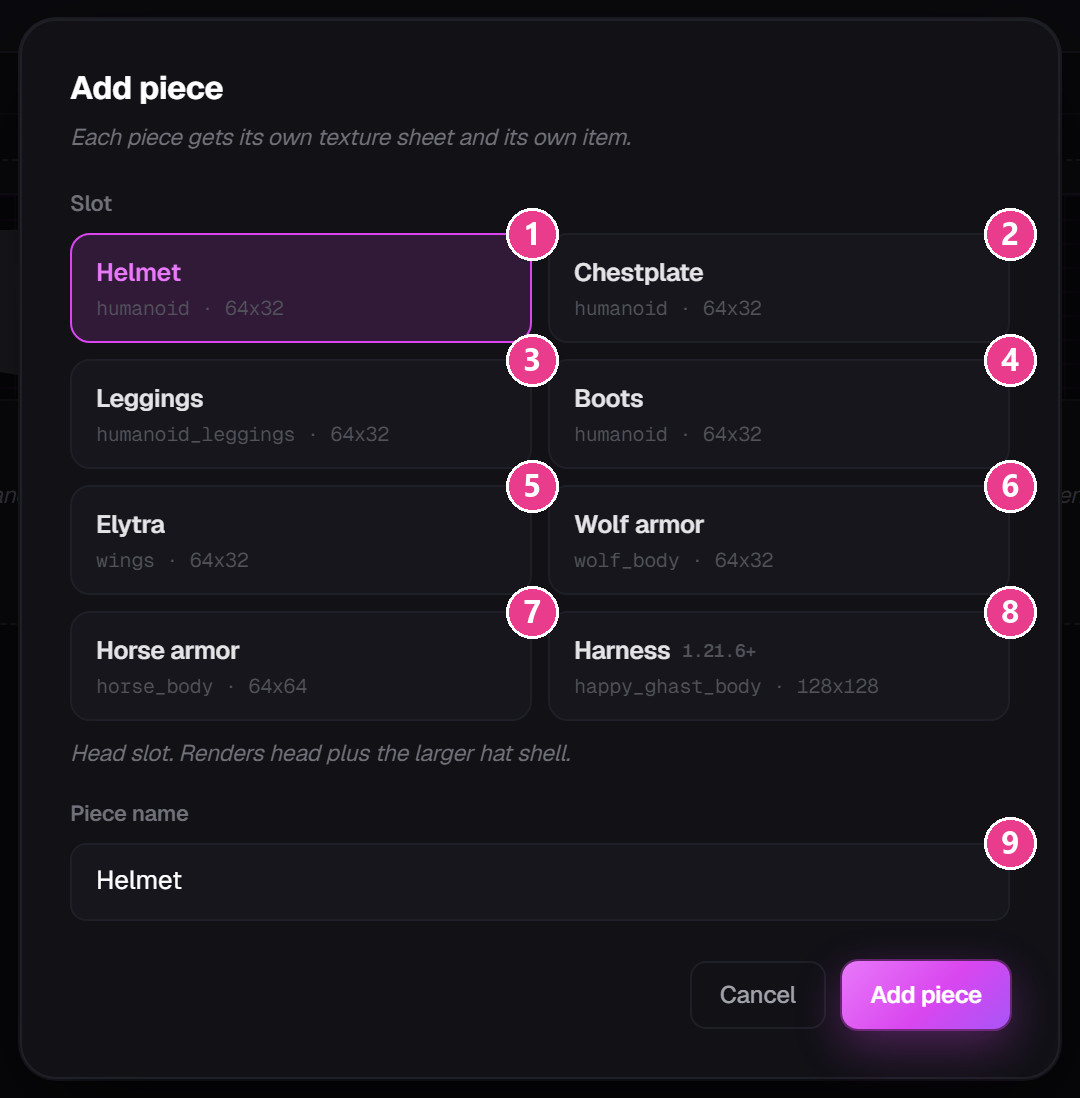
- Helmet
- Chestplate
- Leggings
- Boots
- Elytra
- Wolf armor
- Horse armor
- Harness — for happy ghasts. Needs Minecraft 1.21.6+.
- Piece name — pre-filled with the slot name, which is usually fine.
Pick a slot, then press Add piece. Each card tells you what that slot covers — there's more detail in The eight slots.
5. Open it and start painting
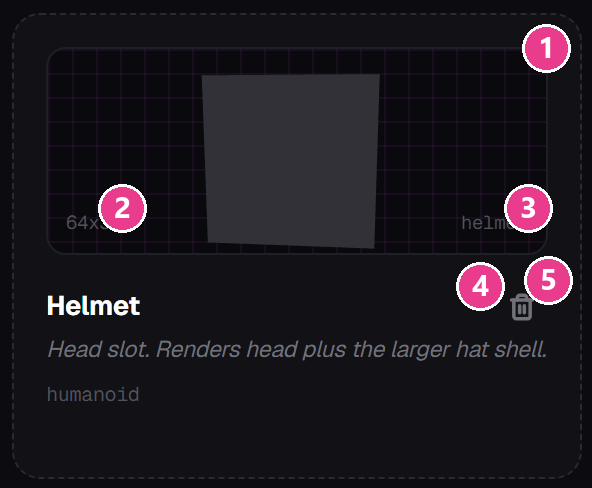
- Live 3D preview — spins slowly, and updates as you paint.
- Canvas size of this piece's texture sheet.
- Slot it's worn in.
- Piece name.
- Remove piece — the trash icon.
Removing a piece is instant. That trash icon deletes it straight away with no “are you sure?”. Deleting a whole set does ask first.
Click the card and the painter opens.